
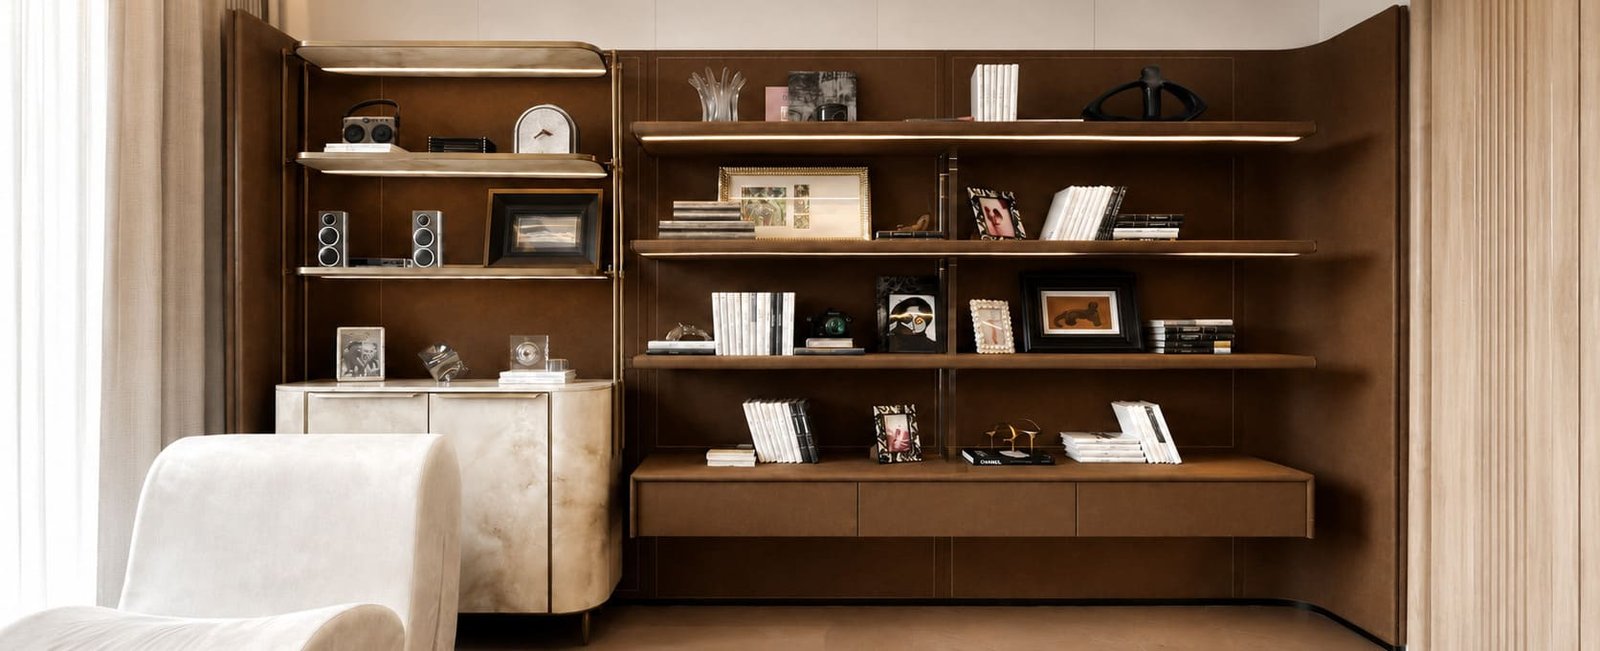
For custom cabinets, in addition to choosing a suitable substrate based on the use environment, edge banding quality is also important. Complete and stable edge banding can reduce direct contact between the panel edge and moisture, dust, or dirt. It can also reduce the risk of moisture entering the panel from the edge in humid conditions. However, edge banding cannot change the moisture resistance of the substrate itself. It also cannot make an ordinary panel waterproof.
Even when the same panel, edge banding, and adhesive are used, the finished results may still be different. Some panels have continuous and relatively even glue lines, smooth corners, and a natural transition between the edge banding and the panel surface. Others may have uneven glue lines, whitening at the corners, lifting at the ends, or edge banding that can be peeled off easily.
To understand these differences, we first need to understand the different functions of the edge banding and the edge-banding adhesive. We also need to understand why they should not be evaluated separately.
What Are the Functions of Edge Banding and Edge-Banding Adhesive?
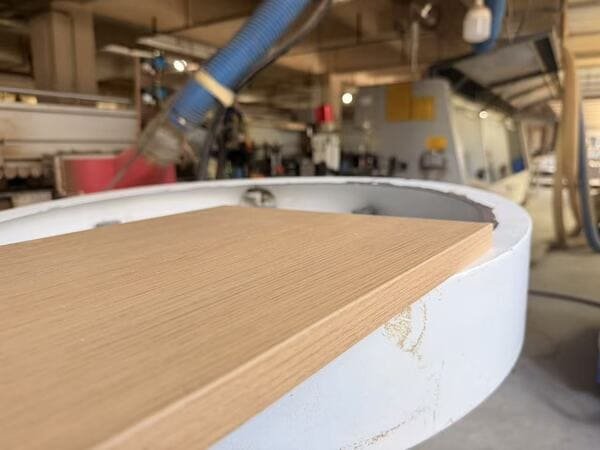
Edge banding is used to cover the exposed edge of a panel. Besides hiding the raw panel edge, it also affects the colour, grain, gloss, corner finish, and how the cabinet edge feels in daily use. It can also reduce direct contact between the panel edge and moisture, dust, or dirt. Common edge-banding materials for custom cabinets include PVC, ABS, and wood veneer.
Edge-banding adhesive connects the panel edge to the edge banding. Common adhesives used for custom cabinets include EVA hot-melt adhesive and PUR reactive hot-melt adhesive1.
| Category | Material | Main characteristics | Suitable applications and points to consider |
|---|---|---|---|
| Edge banding | PVC | Available in many colours and specifications, with a relatively low cost | Suitable for many standard custom cabinets; actual performance is affected by the formulation and processing conditions; some projects may restrict materials that contain chlorine |
| Edge banding | ABS | Usually has good toughness and impact resistance, and does not contain chlorine | In the supply channels we currently use, the selection is relatively limited, and the purchasing cost is usually higher than commonly used PVC |
| Edge banding | Wood veneer | Provides a natural wood appearance and can match veneered panels | Natural colour and grain variation should be expected, and processing is usually more difficult than with plastic edge banding |
| Edge-banding adhesive | EVA | Bonds mainly through cooling, and the process is well established | Suitable for many standard furniture applications and dry environments; performance under continuous heat and long-term humid conditions should be evaluated |
| Edge-banding adhesive | PUR | Continues to react and cure after the initial pressing | After full curing, it usually has better heat and moisture resistance; specific performance should be confirmed through the product technical data |
Edge banding and edge-banding adhesive perform different functions, but they need to be compatible. The edge banding, adhesive, and panel edge must work together. They also need to be pressed under stable processing conditions to provide good edge protection and bonding performance.
What Does Good Cabinet Edge Banding Look Like?
When customers receive cabinet panels or edge-banding samples, they can first inspect the glue line, both ends of the panel, the corners, and the transition between the edge banding and the panel surface. Good edge banding should not only look neat. The processing details and long-term bonding stability should also remain consistent.
| Inspection position | Signs of good quality | Problems to look for |
|---|---|---|
| Glue line | Continuous and relatively even in width | Missing adhesive, local gaps, or obvious adhesive overflow |
| Both ends | Fully bonded without looseness | Openings, chipped corners, lifting, or looseness when lightly pushed by hand |
| Corners and upper and lower edges | Continuous and smooth, without obvious burrs | Cutting marks, sharp edges, cracking, or obvious whitening on dark edge banding |
| Edge banding and panel surface | Natural transition without an obvious step | Height differences, waviness, or local unevenness |
| Colour and surface | Relatively consistent colour, grain, and gloss | Colour differences, mismatched grain, or obvious gloss differences |
| Condition after storage | Remains stable after curing | Lifting, adhesive failure, or easy peeling |
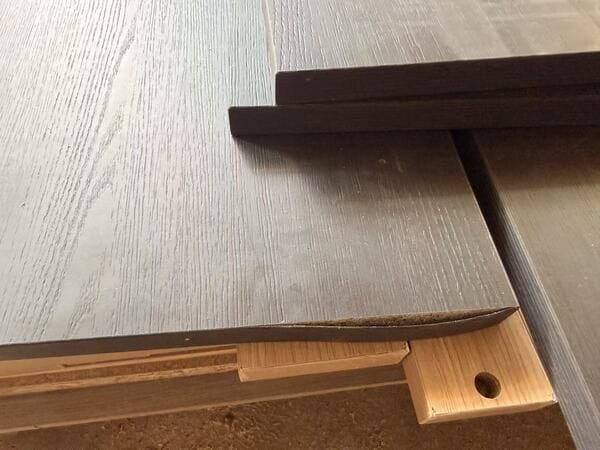
In the image, the edge banding on the upper dark panel is flat and properly bonded. The edge banding on the dark panel in the foreground has a local opening and has started to lift. This clearly shows the difference between normal and abnormal edge-banding conditions.
Traditional hot-melt edge banding usually leaves a visible adhesive layer. Therefore, a completely invisible glue line should not be used as the only quality standard. Samples made with PUR reactive hot-melt adhesive also need time for the adhesive layer to continue curing before the bonding stability is checked.
For this reason, edge-banding quality cannot be judged only by the name of the edge banding or adhesive. Customers should inspect the finished glue line, edge processing, material compatibility, and stability after curing.
Which Factors Affect the Final Edge-Banding Result?
Even when the same panel, edge banding, and adhesive are used, the results may still vary between production batches. Edge banding is not simply a matter of attaching a strip to the panel. The panel edge, material condition, and adhesive2, together with the equipment and processing conditions, all affect the final result.
Condition of the Panel Edge
The panel edge should be flat, vertical, and relatively clean. If it has chipped areas, dents, deep cutting marks, or too much dust, the adhesive may not cover the surface evenly. This can affect both the glue line and the bonding condition.
Different substrates have different edge structures. The particle structure of particleboard, the flatness and dust condition of an MDF edge, and possible core voids or veneer gaps in plywood can all affect adhesive coverage and bonding. Therefore, the same adhesive and edge banding may produce different results on different substrates or panels of different quality.
Compatibility Between the Edge-Banding Primer and Adhesive
The back of plastic edge banding usually has a primer. This helps the adhesive form a stable bond with the edge banding. The final bond can be affected by whether the primer is evenly applied, whether it is suitable for the selected adhesive, and how the edge banding has been stored.
If the primer and adhesive are not compatible, the edge banding may look acceptable immediately after pressing. However, local adhesive failure may appear after storage. During a peel check, separation may also occur at the interface between the edge banding and the adhesive layer.
Material Temperature, Adhesive Temperature, and Application Amount
During edge banding, the adhesive temperature shown on the machine is not the only factor to consider. The temperatures of the panel and edge banding also matter. If the materials are too cold, the hot-melt adhesive may cool quickly after contacting the panel. It may begin to lose its flow before it has fully wetted and covered the panel edge.
The amount of adhesive also needs to remain stable. Too little adhesive may cause missing glue and local gaps. Too much may create a wider glue line or adhesive overflow. Using more adhesive does not automatically make the edge banding stronger.
Feed Speed and Pressing Condition
After the adhesive is applied to the panel edge, the edge banding needs to be pressed within a suitable period. If the feed speed does not match the open time of the adhesive, the adhesive layer may cool too much before pressing.
The pressure, position, and condition of the pressure rollers also affect contact between the edge banding and the panel. If the pressure is too low or uneven, the middle area may bond correctly while the ends or local areas remain loose.
Trimming Tools and Processing Settings
After the edge banding is applied, the panel still needs end trimming, edge trimming, scraping, and polishing. Blunt tools, excessive scraping, or unsuitable corner-radius settings may cause whitening, cracking, cutting marks, or height differences between the edge banding and the panel surface.
Therefore, when whitening or an uneven edge appears, it is not always correct to blame the edge banding or adhesive immediately. The material temperature, tool condition, and trimming settings also need to be checked.
Overall, the material name only describes one part of the edge-banding solution. The final result also depends on stable coordination between the panel edge, edge-banding primer, material temperature, adhesive application, pressing, and trimming.
How Does Horace Home Inspect Edge-Banding Results?
The following information is based on the materials, equipment, and processing methods currently used by Horace Home. Different veneer specifications, adhesive models, and edge-banding machines may require different operating methods.
When we inspect edge banding in the workshop, we do not only check whether the material list specifies PVC edge banding, wood veneer edge banding, or PUR adhesive. The material name only tells us what was used. What matters is the actual condition of the finished panel edge.
Which Details Should Be Checked on Standard Plastic Edge Banding?
We commonly use 1 mm PVC edge banding. The four sides of a standard panel usually use the same edge-banding material, thickness, and colour. If the customer’s drawings, finish requirements, or panel structure require something different, we adjust the solution separately.
After the panel leaves the edge-banding machine, we inspect all four sides. We focus on the glue line, both ends, the corners, and the transition between the edge banding and the panel surface.
Some problems are difficult to see from the front. We also slide a hand from the panel surface towards the edge banding to check for a step at the joint. For dark or wood-grain edge banding, we inspect it from the side to check for obvious whitening, colour differences, or gloss differences.
When PUR adhesive is used, we first confirm that the edge banding has been pressed into position and that both ends are stable. PUR continues to cure after the panel leaves the machine, so the initial condition is not enough. After the sample has been stored for a period, we inspect it again for lifting, adhesive failure, or easy peeling.
Why Can Wood Veneer Edge Banding Not Use Exactly the Same Process as PVC?
The wood veneers we commonly use include red oak, white oak, walnut, figured maple, and engineered veneer. We currently use two main types of veneer edge-banding material. One is approximately 0.6 mm thick without a non-woven backing. The other is approximately 0.3 mm thick with a non-woven backing. Adding a non-woven backing to thinner veneer makes it more stable during processing. It also helps the back of the veneer form a more stable bond with the adhesive.
Whether wood veneer edge banding is applied by machine or by hand depends on the shape and size of the panel. Straight-edged panels can usually be processed by machine, while curved panels are mainly handled manually. We are currently producing a batch of straight-edged panels approximately 4 m long, and we are applying the edge banding by hand. When panels of this length are processed by machine, they require more handling space and more movement during feeding. This increases the risk of damaging the finished surface.
When applying veneer edge banding by machine, we usually only use the pre-milling, adhesive application, conveying, and pressing functions. We do not use the standard trimming cutters. The reason is simple. When the cutters rotate at high speed, they may tear the veneer along the grain.
After the veneer has been pressed by machine, the remaining trimming is completed by hand. We place a flat board against the edge-banded surface as support, remove the excess veneer, and then lightly sand the trimmed area with 320-grit sandpaper.
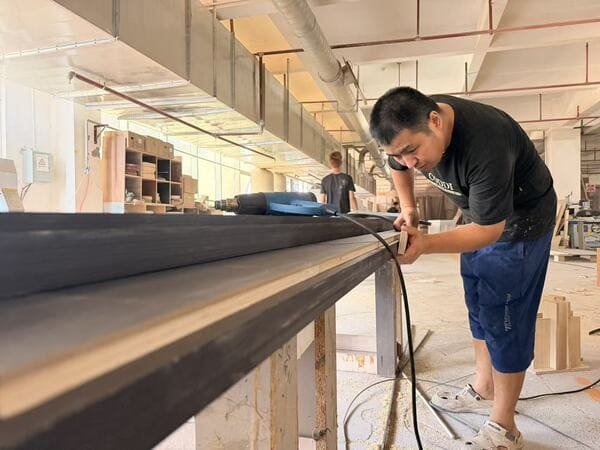
This process cannot be rushed. Too much sanding pressure may damage the finished panel surface. Too little pressure may not make the edge smooth enough. We sand gradually and use our hands to check whether the veneer edge feels smooth.
If the veneer and panel have already received a UV finish, the area near the glue line usually needs colour touch-up after edge banding and sanding. We compare the colour difference between the edge and the panel surface, then adjust the local area so that the colour transition between the veneer edge banding and the panel surface looks more natural.
These methods do not mean that hand processing is always better than machine processing, or that machine processing is always more stable. For us, the more important point is to choose a suitable method based on the edge-banding material, panel shape, and panel size. We then inspect the actual finished result.
Final Notes
Edge-banding quality cannot be judged only by the material name. The condition of the panel edge, the primer on the back of the edge banding, adhesive performance, the pressing process, and the final trimming all affect the glue line, corner finish, and bonding stability.
For a custom cabinet project, a more reliable method is to confirm the material solution first. The actual sample should then be used to check whether the colour, grain, glue line, edge feel, and bonding condition meet the project requirements.
Horace Home selects a suitable edge-banding method based on the panel finish, size, shape, and installation position. Standard plastic edge banding, straight veneer edges, curved panels, and extra-long panels may not use exactly the same processing method. Material selection is important, but the final point that needs to be confirmed is whether the finished panel meets the customer’s expectations.