
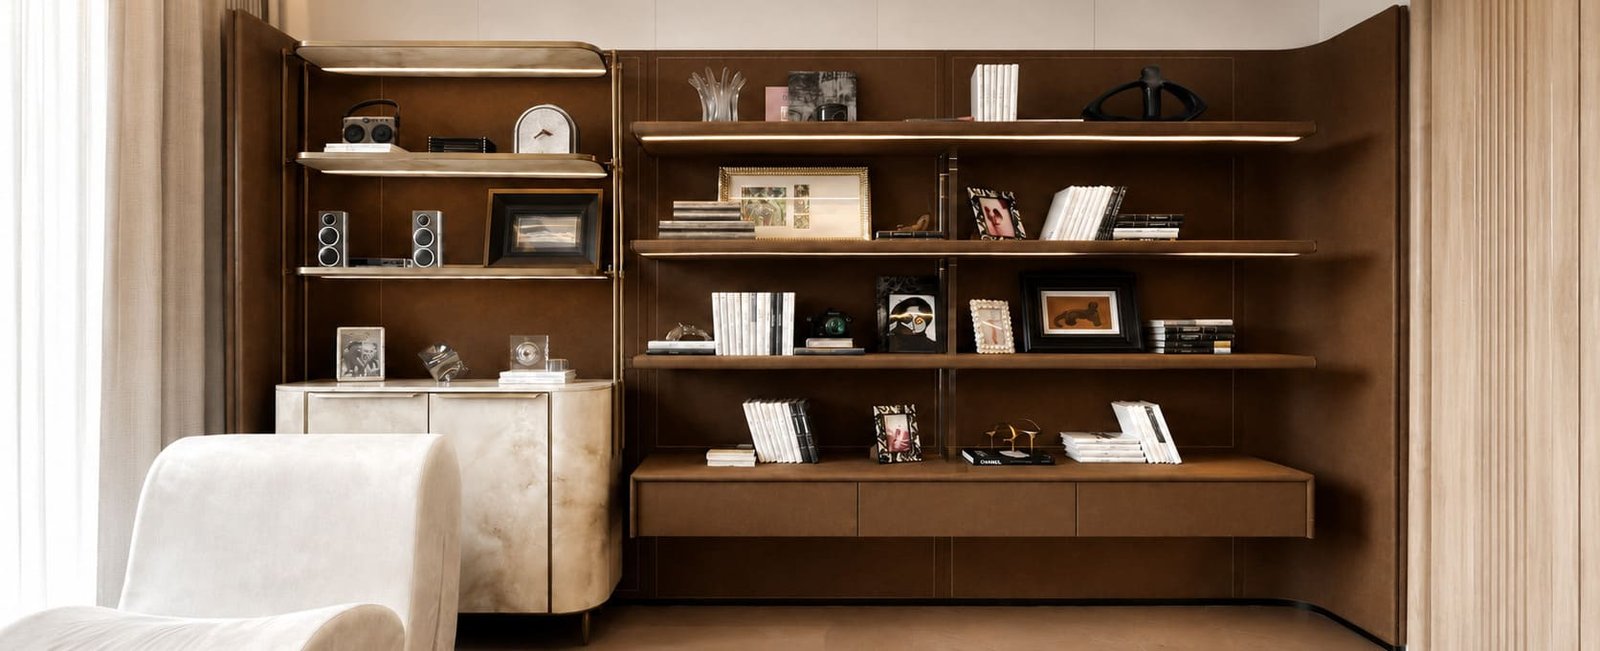
Many clients focus on the wood species, color, and grain appearance when confirming wood veneer cabinet doors. However, after production starts, how the veneer is applied to different cabinet components can also affect the final result.
In our production process, the same wood veneer finish does not always use the same processing method. Standard flat panels, curved structures, and irregular-shaped components require different approaches in substrate preparation, veneer application, and surface finishing.
For example, standard flat panels can usually be processed from veneer-laminated panels. However, for curved or irregular-shaped components, we need to consider the internal structure, panel shape, and final appearance requirements. Depending on the design, we may use manual veneer application or combine pre-veneered flexible plywood with the internal structure.
Therefore, applying wood veneer is not simply a process of “putting veneer on a panel.” In this article, we will introduce how we process wood veneer for different custom cabinet components, including veneer application, sanding, and finishing processes after veneer application.
Why Do Different Cabinet Components Need Different Wood Veneer Processing Methods?
In actual production, we do not decide the processing method only based on veneer thickness. Even with the same wood veneer, different panel structures, sizes, and appearance requirements may require different production methods.
Standard flat panels usually have a stable structure and are suitable for further processing after the veneer panel is completed. However, curved and irregular-shaped components require more consideration of veneer flexibility, internal support structure, substrate forming method, and veneer application process.
For veneer-laminated panels, applying veneer on both sides is also a common production method. Besides keeping the appearance consistent on both sides, double-sided veneer can help reduce the influence caused by different surface conditions on each side of the panel, making the panel more stable during further processing.
Based on our current production methods, wood veneer cabinet components mainly use the following processing methods:
| Cabinet Component Type | Common Method |
|---|---|
| Standard flat panels | Using supplier-produced veneer-laminated panels for cutting, edge treatment, and further processing |
| Manually veneered flat panels | Preparing the substrate first, then applying veneer, sanding, and finishing in our factory |
| Curved or irregular surfaces | Applying thin wood veneer manually according to the structure |
| Complex curved structures | Using pre-veneered flexible plywood and combining it with the internal structure |
How Are Standard Flat Wood Veneer Cabinet Doors Processed?
For standard flat cabinet doors or cabinet components, we commonly use panels that already have wood veneer laminated to the substrate.
These panels are usually completed by the supplier with basic preparation, including plywood substrate preparation, surface sanding, and veneer lamination on both sides. For example, with the 0.6 mm wood veneer we commonly use, the veneer is first laminated with the plywood substrate to form a complete panel. The full panel then enters our production process.
Applying veneer on both sides keeps the surface appearance consistent. It also helps reduce the influence of different surface conditions between the two sides of the panel. For standard flat components that require cutting, edge treatment, and surface finishing, this method provides a more stable processing base.
After the panels arrive at our factory, we first check the veneer surface condition. We check whether there are veneer cracks, bubbles, and whether the appearance of both sides meets the requirements.
Since the panels have already been sanded during the previous production stage, we usually do not make large adjustments to the flatness again. Instead, we focus on checking whether the surface condition is suitable for further processing.
After confirming the panel condition, the main process includes:
Cutting → Edge treatment → Overall sanding → Surface finishing
For natural wood veneer projects, the veneer grain direction and cutting direction also need to be confirmed in advance because the cutting method affects the final grain arrangement.1
If slight burrs appear after cutting, we usually handle them together with the overall sanding process after edge treatment instead of repairing them separately.
This method is more suitable for standard flat components that require stable dimensions and efficient production. Veneer lamination and cabinet processing are completed at different production stages. This helps reduce the influence between different processes and allows us to complete edge treatment, structural processing, and surface finishing according to project requirements.
How Do We Apply Wood Veneer Manually?
Although many standard flat components can be processed from veneer-laminated panels, we also apply veneer manually in our factory for some special components according to the panel requirements and production conditions.
Compared with pre-veneered panels, manual veneer application requires more process control. The substrate flatness, veneer condition, and wood veneer specifications can all affect the final surface result.
Before manual veneer application, the substrate needs to be prepared first. For some flat panels or irregular-shaped components, the substrate usually goes through:
Body filler → Air sanding → Surface cleaning
The substrate is usually sanded with 180 grit and 240 grit sandpaper to keep the veneer application surface flat.
After substrate preparation, we lightly moisten the veneer according to its condition. This process is usually done by lightly spraying water with a spray bottle. It helps the veneer become more flexible and easier to apply.
This does not mean soaking the veneer. The amount of moisture is controlled according to the actual production situation.
The manual veneer application process is:
Apply veneer adhesive to both the veneer and substrate → Manual veneer application → Use a heated veneer pressing tool for assistance
After veneer application, the surface still needs sanding and adjustment. Depending on the component condition, we usually allow it to rest for around 48 hours before moving to the painting process.
Manual veneer application is not a fixed method for every wood veneer cabinet door. It is mainly used for some special sizes, special structures, or components that need additional adjustment during production.
How Are Curved and Irregular-Shaped Wood Veneer Components Processed?
Compared with standard flat panels, the main challenge of curved and irregular-shaped cabinet components is not only applying veneer to the surface. The substrate structure, forming method, and veneer application method need to be considered together before production.
For these components, the veneer needs to follow the shape of the substrate. Therefore, the substrate construction method and veneer application method need to be confirmed at the same time.2
In our production, curved and irregular-shaped wood veneer components mainly use two methods.
Method 1: Complete the Irregular-Shaped Substrate First, Then Apply Veneer
The first method is to complete the irregular-shaped substrate first and then apply veneer to the finished surface.
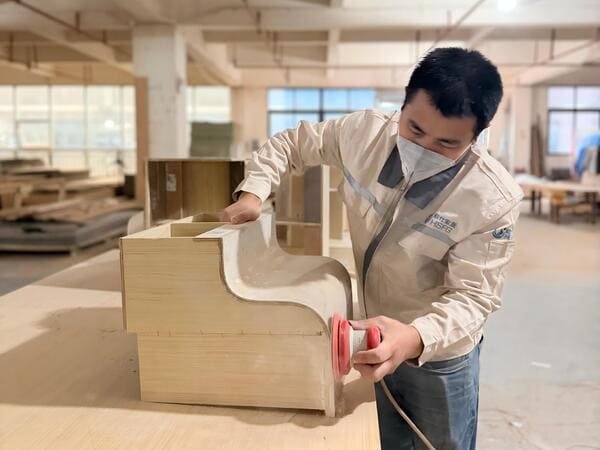
For some curved structures, we first complete the internal structure according to the design requirements.
We use CNC machining to create the curved edges, complete the flat areas, and make the internal support structure for the curved section.
After the support structure is completed, flexible plywood is fixed onto the structure to form the complete curved substrate.
The substrate surface then needs to be prepared using the manual method mentioned above.
For curved components, we usually use 0.3 mm wood veneer for manual application. Compared with thicker veneer, thinner veneer can better follow curved surfaces, making it more suitable for this type of structure.
After substrate preparation, the component moves to veneer application and further processing.
Method 2: Apply Veneer to Flexible Plywood First, Then Combine It with the Structure
Another method is to complete veneer lamination on flexible plywood first, and then combine it with the internal structure.
This method is usually suitable for components that require a continuous curved surface appearance.
The process is:
Laminate veneer to flexible plywood → Build internal substrate and support structure → Bond the pre-veneered flexible plywood → Use woodworking F-clamps to maintain pressure → Further adjustment and surface finishing
The fixing time with F-clamps is usually around 24–48 hours depending on the component shape and bonding condition.
This is not a fixed standard time. We judge it according to the actual structure and bonding condition.
How Do We Sand and Handle Edges After Veneer Application?
After veneer application, the surface still needs further processing before moving to the finishing stage.
Sanding is not only used to adjust surface flatness. It also helps create a more stable base for the final wood grain appearance and surface finish.
In our production, different sanding grits are selected according to different processing stages.
For substrate preparation before manual veneer application, we usually use 180 grit and 240 grit sandpaper to keep the surface flat.
After veneer application, large surface areas are usually sanded with 240 grit and 320 grit sandpaper. Edges and detailed areas are usually processed with 320 grit sandpaper.
However, sanding grit is not a fixed standard. Different veneer species, surface conditions, and final finishing requirements can affect the actual sanding method.
How Are Wood Veneer Edges Processed?
The edge treatment method needs to be adjusted according to the component structure and edge design.
For standard straight edges, we usually use straight-line edge processing equipment. For curved or irregular-shaped edges, manual finishing is required.
Unlike PVC or ABS edge banding materials, natural wood veneer has its own grain direction and thickness variation. Therefore, edge processing requires more attention to the grain direction and working pressure.
If the processing method is not suitable, working along the grain direction may cause veneer tearing or surface damage.
For some veneer edge details, we use a flat support piece during manual adjustment and lightly sand with around 320 grit sandpaper. This helps reduce the impact on the veneer surface.
After these processes are completed, the veneer components can move to the next surface finishing stage.
How Are Wood Veneer Cabinet Doors Finished?
After veneer application and sanding, the final appearance still needs to be adjusted through the finishing process.
For natural wood veneer, the final color, grain appearance, and surface texture are not only determined by the veneer itself. They are also affected by substrate preparation, sanding methods, and the finishing system.3
Different projects may have different requirements for veneer appearance. Some projects need a more natural wood grain variation, while others require a more balanced color appearance. Therefore, the finishing method needs to be adjusted according to the final design requirements.
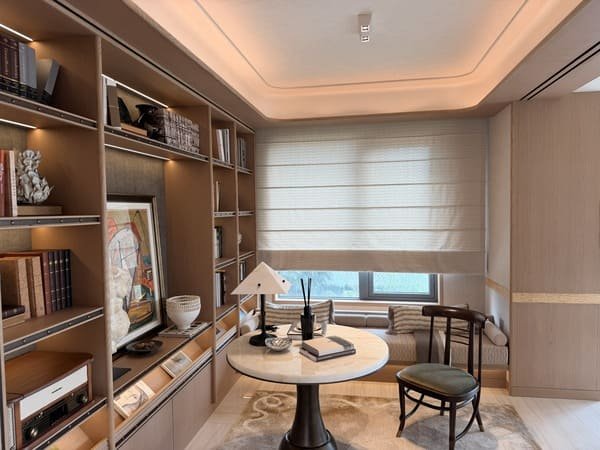
For example, in the Vanke Puyuan project we participated in, the cabinet doors used white oak veneer and required a semi-transparent open-pore effect with a matte finish.
To keep the natural wood grain appearance while controlling the overall color and texture, the project used multiple finishing steps.
The actual finishing process was:
1 coat of primer → Sanding → Color staining → Sanding → 1 coat of color adjustment → Sanding → 1 coat of topcoat → Sanding → 1 coat of matte topcoat
The sanding process usually uses around 320 grit sandpaper. However, the exact grit can be adjusted according to the veneer species, surface condition, and final appearance requirements.
The order of primer and staining is also not always fixed.
For example:
- Applying staining first can make the wood grain appearance more visible.
- Applying primer first can make the overall wood grain appearance more balanced.
Therefore, the final appearance of wood veneer cabinet doors is not created by simply selecting a veneer type and applying paint.
The whole finishing process needs to be adjusted according to the required grain, color, and surface appearance.
Final Notes
The production of wood veneer cabinet doors is not completed by simply selecting a veneer type and following one fixed process.
Different panel structures, surface requirements, and project conditions can affect the final production method.
For custom projects, we focus on finding the right balance between design requirements and production feasibility.
For example, standard flat panels usually focus more on dimensional stability and production efficiency, while curved or irregular-shaped components require earlier consideration of substrate structure, veneer application methods, and surface finishing.
The final appearance is partly decided before production starts.
Confirming the right materials, structure, and processing methods in advance can reduce later adjustments and help achieve the intended design result.
Horace Home works with clients based on their drawings, dimensions, and appearance requirements to confirm suitable material combinations and production methods.
Based on information from Architectural Woodwork Institute (AWI), *North American Architectural Woodwork Standards*. ↩
Based on information from USDA Forest Products Laboratory, *Wood Handbook: Wood as an Engineering Material*. ↩
Based on information from USDA Forest Products Laboratory, *Wood Handbook: Wood as an Engineering Material*. ↩